
Optimization & Troubleshooting
This is where you fine tune performance.
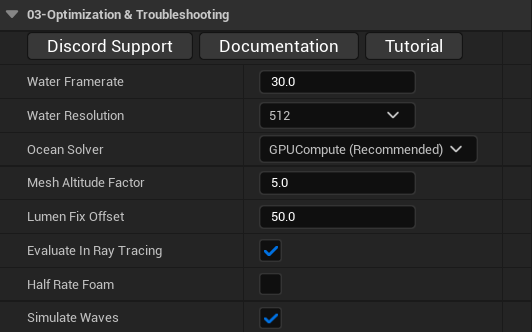
The Optimization & Troubleshooting tab is where we fine tune a variety of performance settings, and some checkboxes that fix some artifacts you may be seeing in your level, depending on your project settings (Lumen, Hardware Raytracing, etc etc)
Discord, Documentation, Tutorial
These are handy shortcuts that will send you directly to our Discord for direct support should you ever need it. We aim to respond very quickly, within a day, usually within the hour (unless it's the middle of the night).
You'll find the link to this documentation page right there, as well as a link to the YouTube tutorial for EasyWaterscape, should you prefer a video format.
Optimizing EasyWaterscape
EasyWaterscape offers a few knobs you can dial in to fine-tune its performance to your project needs.
Water Framerate
How many times per second the simulation ticks forward. Keep this as low as you can get away with. 25-40 is usually a sweetspot, 60 is often unnecessary, especially if your camera is often far/high from the water surface. In wide, distant shots, even 10fps can work surprisingly well, try it out!
Water Resolution
This sets the resolution of the water simulation itself. Higher is better quality, lower improves performance drastically. 32-2048 all run pretty well, regardless of hardware, but at 4096, performance takes quite a big hit, even on a 5090. Use this for cinematics only.
Mesh Altitude Factor
Controls how high the camera can go before the water loses its fine wave detail. This is only something you should adjust if you're really trying to squeeze out as much performance as possible, but will likely not have much impact.
The water is most detailed right around the camera. From high up, that detail is too small to notice, so it gets switched off to save performance. The switch is smooth, so you won't see the water pop.
Higher = fine detail stays on longer as the camera rises. Sharper from above, but more expensive. Lower = fine detail switches off sooner. Faster, good for aerial shots. With Mesh Center set to Center Actor, it uses the camera's distance to the focus point instead of its height.
Half-Rate Foam
This cuts the foam accumulation update by half. Foam decay is time-corrected, so the look is unchanged; halves the foam render-thread cost. Noticeable decline in quality when viewed up close, but from a distance, it is often not noticeable at all. Small performance gain, roughly 0.05ms @512 x30
Simulate Waves
This should be left on at all times. With it off, there will be no waves running when you click "Run EasyWater". The one exception to this rule is if you are using Multiple Water Bodies See the correct workflow in the Multiple Water Bodies section.
Troubleshooting & Artifacts
Because Unreal Engine needs to account for different projects for different platforms, it can get very confusing when you need to decide between using Lumen, Hardware Lumen, Raytracing, each with their own pros and shortcomings. To account for this, EasyWaterscape includes a couple of controls to help deal with the pros and cons of each lighting/reflection choices you make in your project.
Lumen Fix Offset
When using Lumen, if "Use Screen Traces" in the Post Process Volume, (and Evaluate in Ray Tracing) are disabled, you can experience dark patchy issues on the water surface. (See example below) Increasing this value will help offset the traced surface to fix those dark patches.
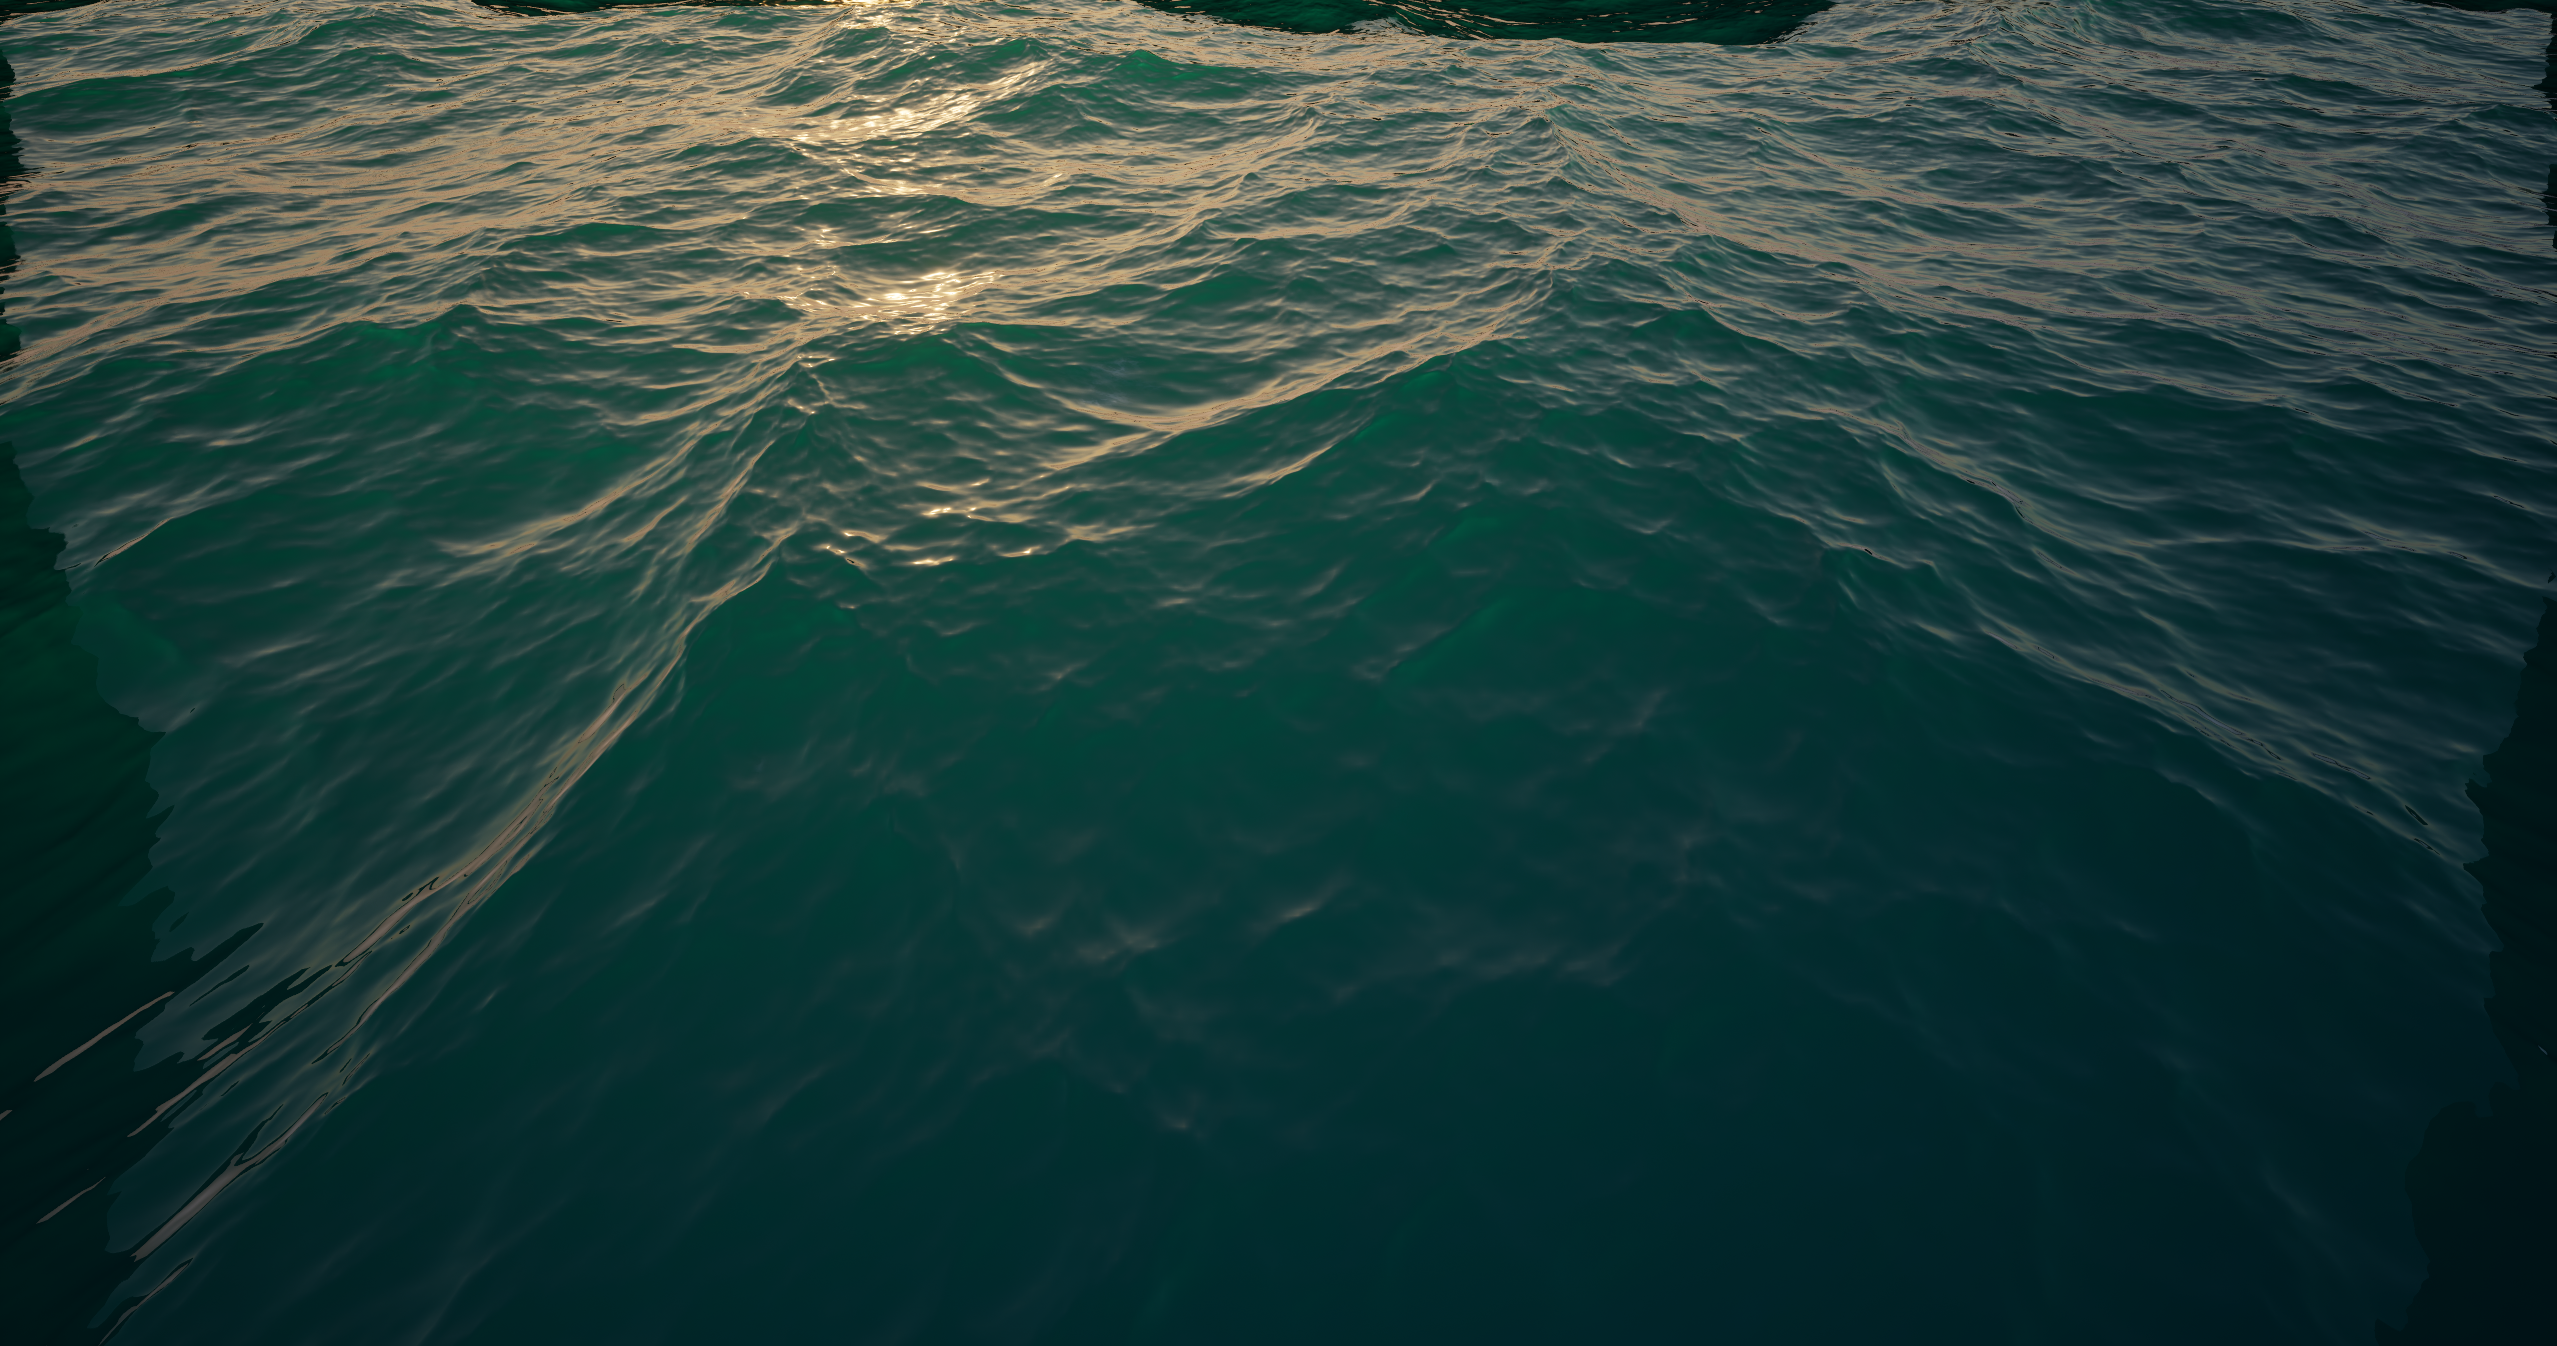
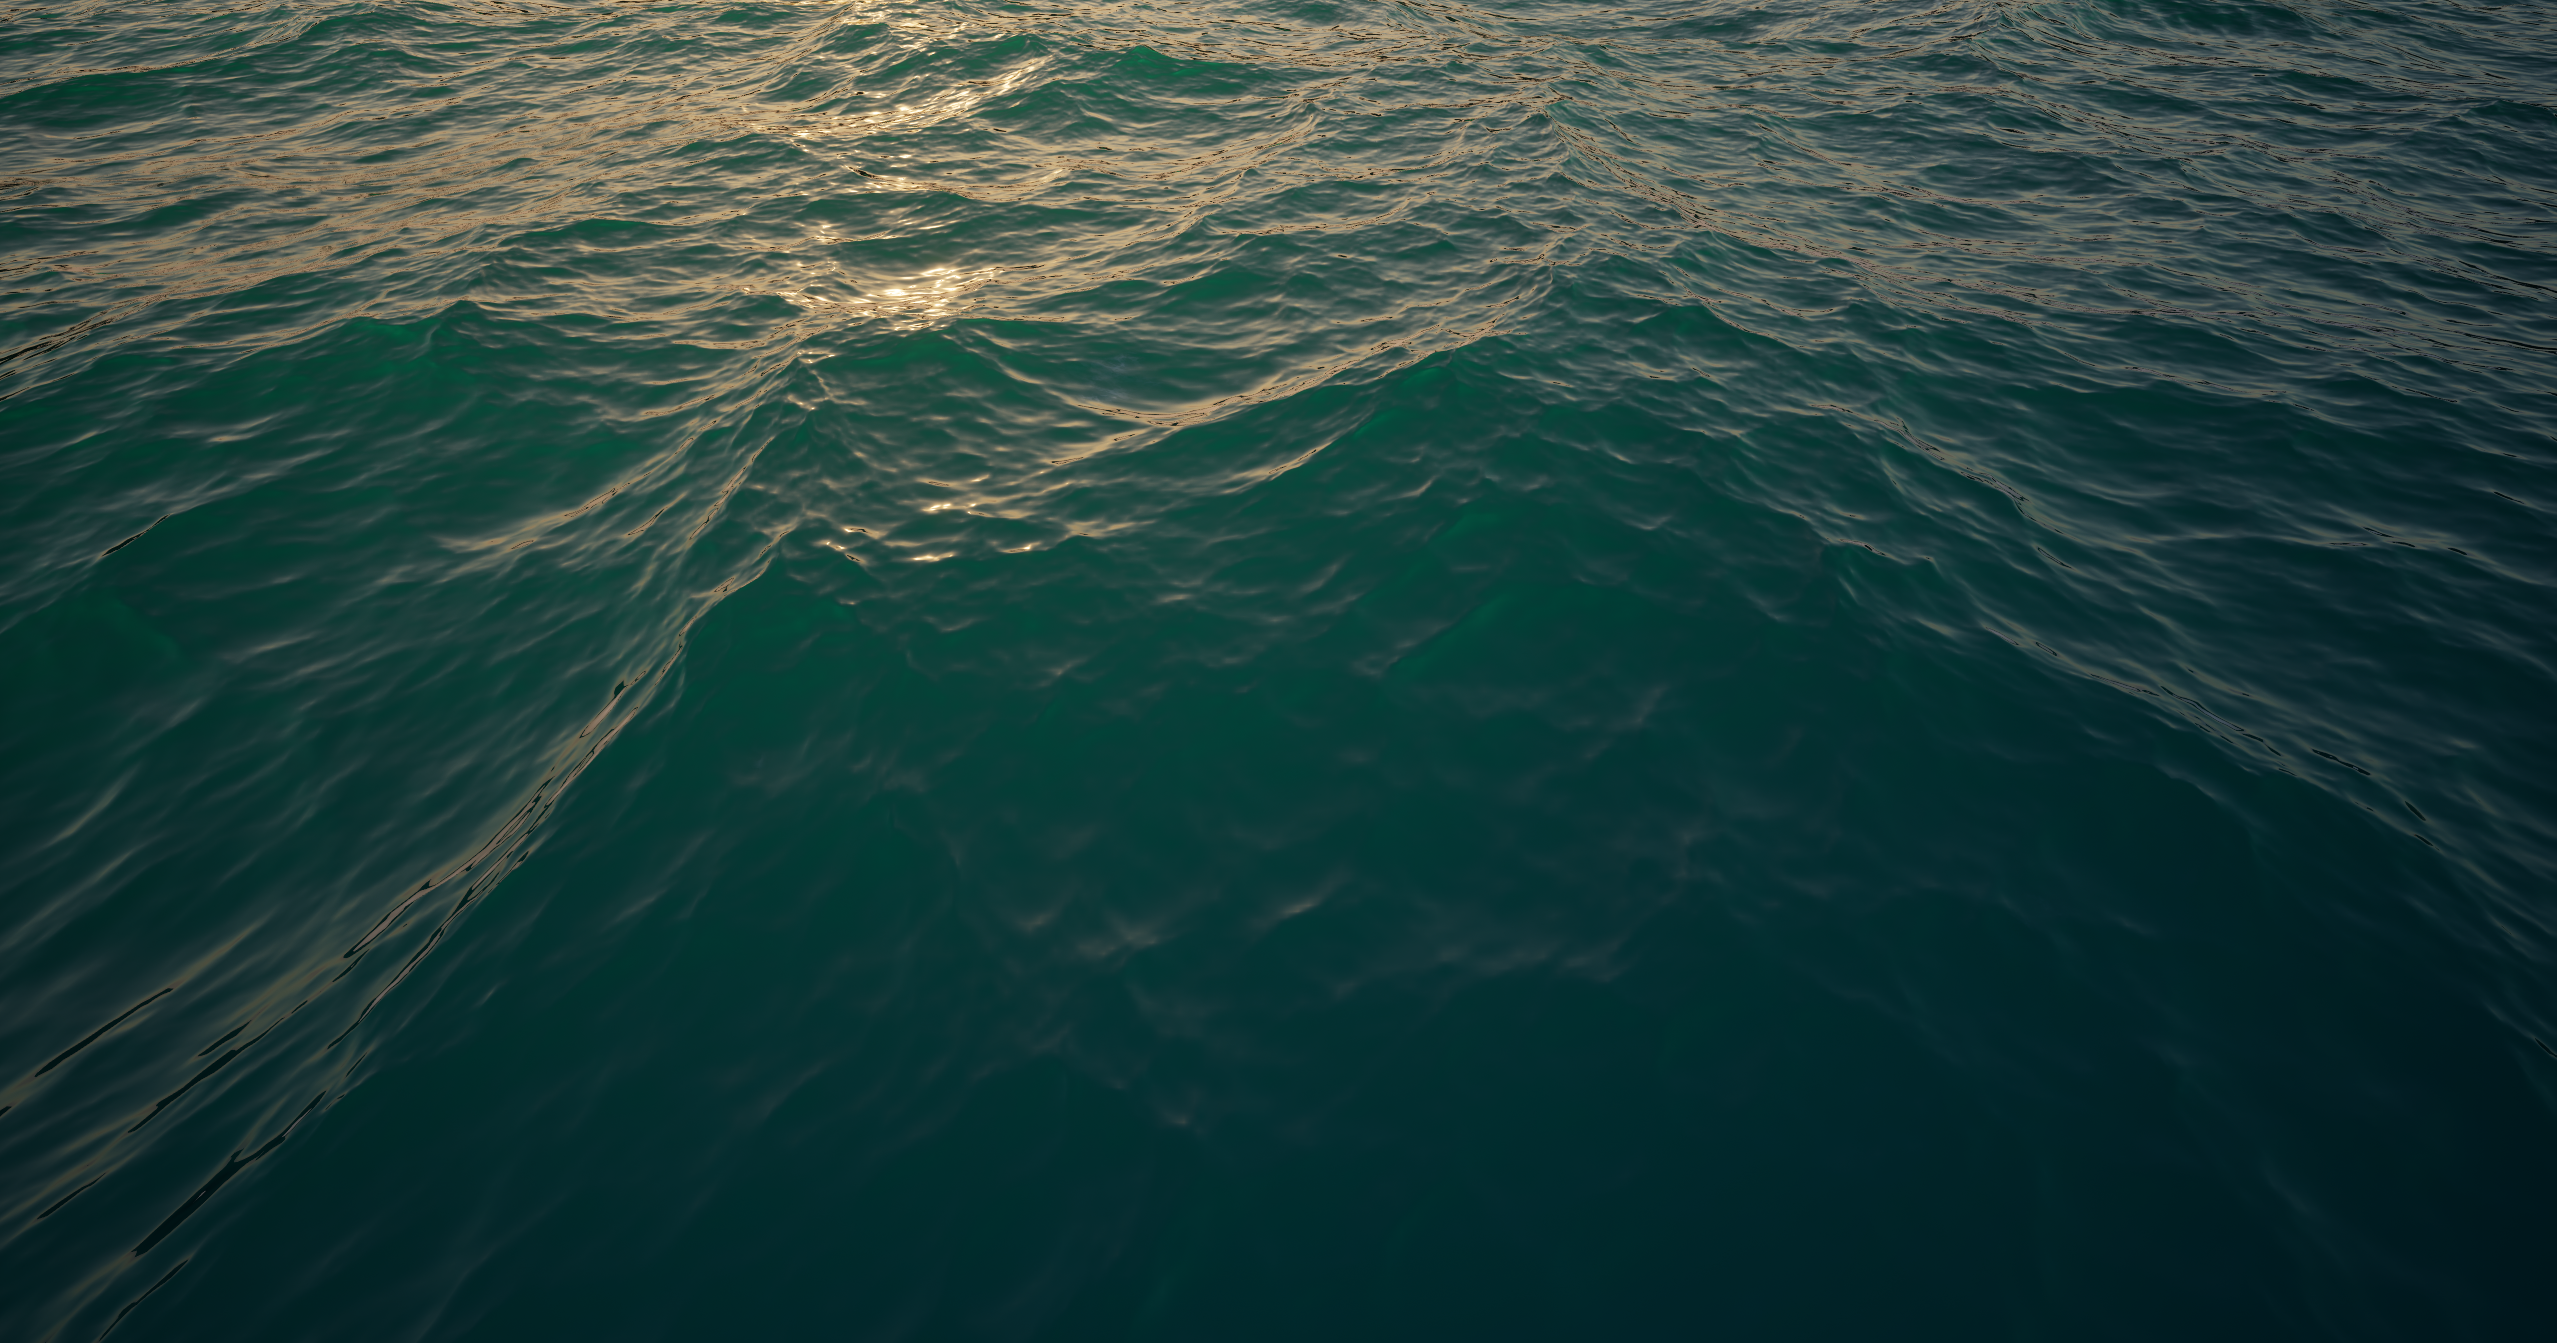
When using Clipmap, if you notice the following kind of screenspace reflection issues below (Notice the artifacts around the edge of the frame), you'll need to increase the Lumen Fix Offset high enough until you don't see it anymore. By default, Lumen Fix Offset is set to 50, which is often just enough. But if your waves are very large and you still see this, Lumen Fix Offset is the solution.
This issue also goes away if Evaluate in Ray Tracing is set to true. Which might seem like a perfect solution, but it has one caveat.
Evaluate in Ray Tracing
When using Clipmap, and Lumen Reflections: By default, this is enabled. This gives the best possible surface near the horizon, prevents screen-space reflection issues along the screen edges. However, with this ticked on, the water does not contribute to the lumen scene, and does not contribute to Global Illumination(GI). Meaning shadowing around the edges of cliffs can look a bit brighter than they should if there is no geometry below the surface to block skylight.
With Evaluate in Raytracing turned OFF, the water surface does contribute to GI, but then you'll encounter some screenspace reflection issues along the edges of the frame as such (see example A). This can be mitigated by increasing the Lumen Fix Offset to, say, 50, which will solve the screenspace reflections edge issue, but, your horizon may also start showing some extra noise. (See Example below).
We recommend leaving Evaluate in Ray Tracing enabled, and placing geometry below the water surface so that cliffs, and surrounding environments get correct GI.
If you are simply using screenspace reflections and not Lumen Reflections, then you need not worry about any of the above.
See the Common Issues section for more information on dealing with artifacts and other known, easy-to-fix issues.
Ocean Solver
The Ocean Solver chooses how EasyWaterscape calculates the waves. Both options give you the same waves; the difference is how much work your PC does to get there.
You'll find it in the Details panel under 03-Optimization & Troubleshooting.
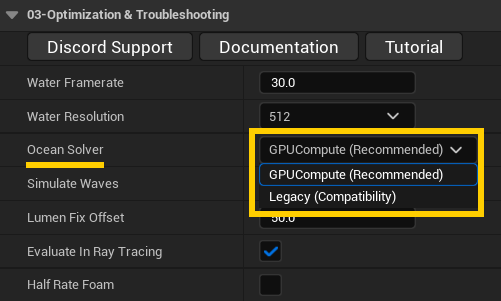
GPUCompute (Recommended)
The new default, and the one you should use. The whole wave simulation runs on a single Niagara GPU simulation, which makes it substantially faster than Legacy (Compatibility)
Legacy (Compatibility)
Soon to be Deprecated
This is the old version of computing the water simulation. The performance is awful, draw calls through the roof. The new default is better in just about every measurable way. This will eventually be deprecated, unless there is a niche use-case for it. Let us know on Discord if you have a specific need for it!
The original solver EasyWaterscape launched with. It builds the waves out of a long chain of render target passes, about 60 of them every time the water updates. The water looks the same, but it costs a lot more, mostly on the CPU.
Only use Legacy if GPUCompute doesn't work in your project, and please let us know on Discord if this happens.
Performance
In our test scene (2560×1440, Water Framerate 30), going from Legacy to GPUCompute:
| Legacy | GPUCompute | |
|---|---|---|
| Frame rate | 159 fps | 217 fps |
| Time spent on the ocean | 2.69 ms | 1.01 ms |
That's about 60% less time spent on the ocean. Most of the saving is on the CPU side (the render thread), not the graphics card. Your numbers will vary with your hardware and settings.
Good To Know
- Set it in the Details panel. The solver is picked when the water starts, so changing it from a Blueprint while the game is running won't do anything.
- Water Resolution and Water Framerate (right above it) are the biggest performance settings, whichever solver you use.
- Simulate Waves: when it's off, this EasyWaterscape doesn't simulate waves at all, so the Ocean Solver setting has no effect.
- Apple Silicon, AMD, and Intel graphics cards: GPUCompute was tested on NVIDIA cards. If you run into problems on another card, switch to Legacy and let us know on Discord.